With nearly half of subscribers willing to change service providers over a poor WiFi experience, ISPs are looking for innovative ways to deliver a WiFi experience that keeps subscribers on board.
So what’s the secret that leading ISPs are turning to? A certified WiFi installation.
Certified WiFi installations guarantee that the home network has been optimized for the best WiFi experience possible. And although traditionally difficult to achieve, certified installations prevent the need for turnaround technician visits, reduce demand on support teams, and most importantly, turn subscribers into loyal brand advocates.
With RouteThis Certify, a flawless Wifi experience is only five simple steps away.
1. Download home layout
Tailor your installation based on each subscriber’s unique home layout.

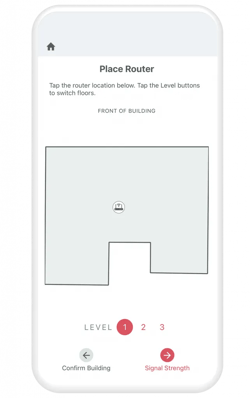
2. Identify prime router location
Use the interactive map to virtually place the router and adjust placement based on WiFi coverage prediction before installing.
3. Optimize connections
Review pod placement recommendations and easily showcase impact of WiFi extenders to subscribers.

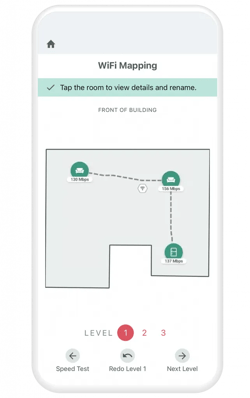
4. Verify whole-home coverage
Walk the home to generate a WiFi heat map and record WiFi speeds throughout the whole home.
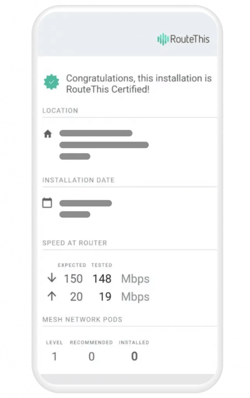
5. Certify the installation
Generate a WiFi certificate to document full details of the in-home environment and verify a successful WiFi installation.